Creative Cake Pop Flower Ideas
Highlighted under: Sweet Baking Treats
I absolutely love making cake pops, especially when I can turn them into delightful flower shapes! It’s a fun way to bring a burst of creativity to a classic treat. Each cake pop can be customized with vibrant colors and decorations, making them perfect for parties or special occasions. I enjoy using different flavor profiles and toppings, from rich chocolate to fruity coatings. Every bite brings joy and a visually stunning surprise that brightens any dessert table. Let’s get started on these whimsical flower cake pops!
When I first attempted making cake pop flowers, it was an adventure filled with excitement and a dash of creativity. I experimented with various cake flavors and frostings, finally settling on a vanilla cake paired with strawberry frosting. The combination turned out to be a real winner, and the vibrant colors added to the flower designs made them irresistible!
One key tip I learned is to ensure the cake mixture is not too wet; otherwise, the pops can fall apart during dipping. Adding a bit of cake pop coating can help bind everything nicely. Once you master the dipping technique, it becomes a play of creativity!
Why You'll Love These Cake Pops
- Each flower pop can be customized with your favorite flavors and colors.
- Perfect for springtime gatherings or as unique party favors.
- An interactive treat that kids and adults will both enjoy decorating!
Flower Shape Techniques
To achieve beautifully sculpted flower shapes, I recommend using your hands to mold the cake into petal forms. You can create a simple flower by making a round center and pinching the edges to form petals. Alternatively, using flower-shaped cookie cutters can give you consistent and meticulous designs. If the cake mixture feels too crumbly, adding a little extra frosting can help bind it together for a smoother molding process.
Keep your fingers damp while shaping the pops to prevent the mixture from sticking to your hands. Additionally, a quick chill in the fridge after shaping can firm them up and make them easier to dip in the coating without losing their shape. I typically let them chill for at least 15 minutes before moving on to the next step.
Coating and Decorating Tips
When melting your chocolate or candy melts, it's vital to do so at medium power, in increments of 30 seconds, stirring in between until it becomes fully smooth and glossy. If you overheat the chocolate, it can seize and become unusable, so watch it closely. You can add a teaspoon of vegetable oil to your melted chocolate to achieve a thinner consistency, which makes dipping easier and provides a smoother finish.
For an added touch of creativity, consider using colored edible markers to draw details on the hardened coating once it has set. Use green candy melts to create leaf accents for your flower pops for an extra pop of color. The key is to work quickly before the coating hardens. If you’re working with kids, it’s a delightful chance for them to unleash their creativity while decorating.
Storage and Serving Suggestions
These cake pop flowers can be made ahead of time and stored for special occasions. Once fully decorated and set, store them in an airtight container. If you plan to keep them for more than a couple of days, I suggest refrigerating them to maintain their freshness, in which case they can last for up to one week. Just ensure they are separated by wax paper to prevent sticking.
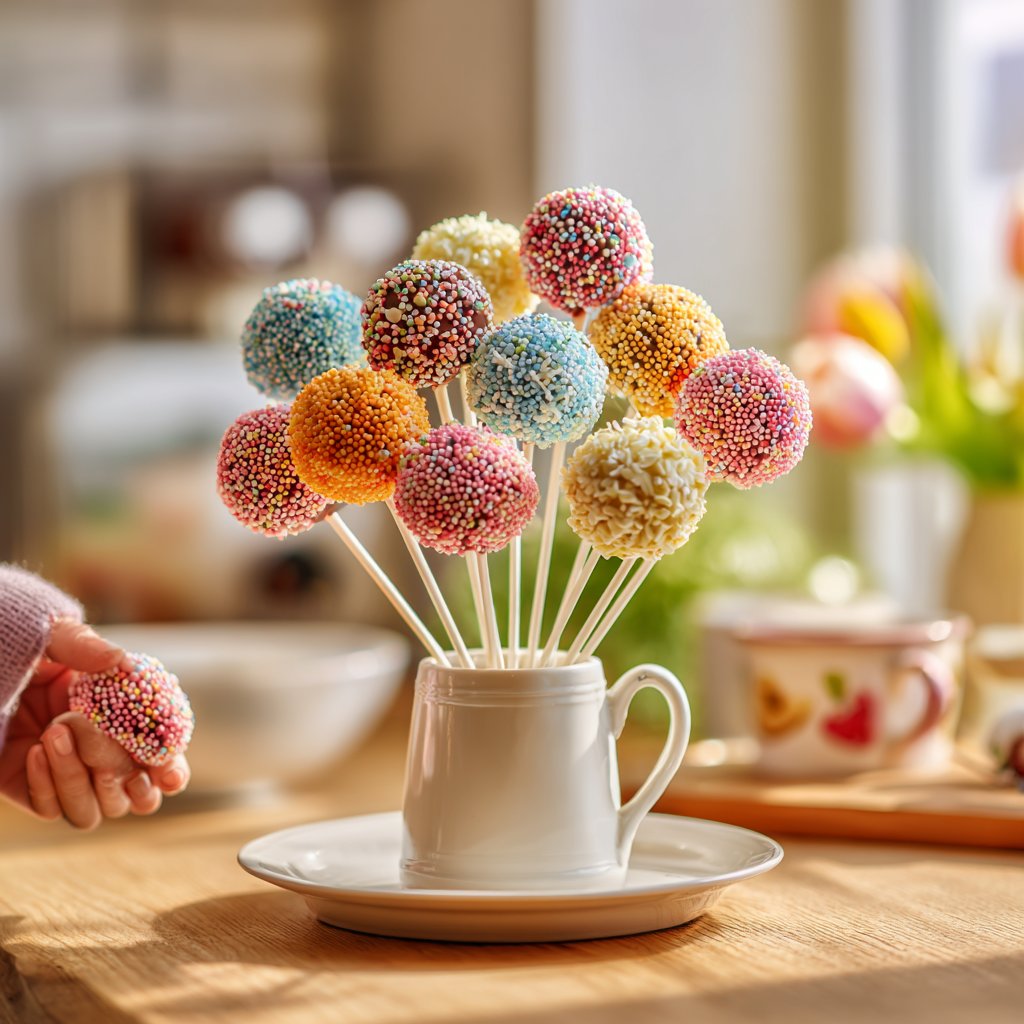
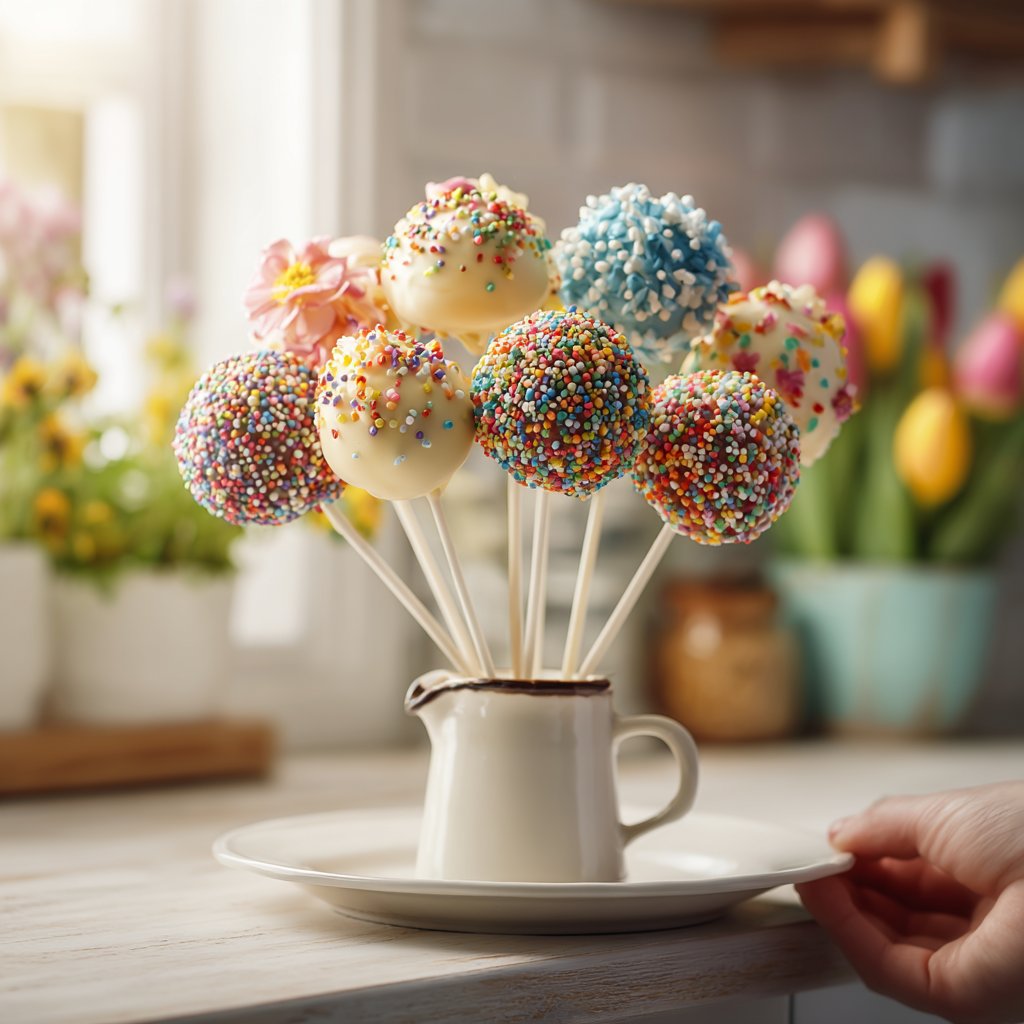
For serving, I love using decorative stands or arrangements, like placing them in small flower pots filled with floral foam to create a whimsical look. These cake pops make fantastic centerpieces at parties or fun additions to dessert tables. Whether enjoyed as a treat or given as a gift, their vibrant colors and playful shapes will surely delight everyone.
Ingredients for Creative Cake Pop Flowers
Cake Pops
- 1 box of vanilla cake mix
- 3 large eggs
- 1/2 cup vegetable oil
- 1 cup water
- 1/2 cup strawberry frosting
- Melting chocolate or candy melts
- Lollipop sticks
- Sprinkles or edible decorations
Decoration
- Colorful edible markers
- Green candy melts for leaves (optional)
- Flower-shaped cookie cutters (optional)
Feel free to mix flavors and colors based on your preferences!
How to Make Creative Cake Pop Flowers
Bake the Cake
Prepare the vanilla cake mix according to the package instructions. Bake in a preheated oven at 350°F (175°C) for about 30 minutes. Allow it to cool completely.
Mix with Frosting
Once the cake is cool, crumble it into a large bowl. Add the strawberry frosting and mix until well combined. The mixture should be moldable.
Form the Cake Pops
Scoop about a tablespoon of the mixture and mold it into flower shapes or balls. Insert a lollipop stick into each pop and place them on a baking sheet lined with parchment paper.
Chill the Pops
Refrigerate the cake pops for at least 30 minutes to firm up.
Melt the Coating
In a microwave-safe bowl, melt the chocolate or candy melts according to the package instructions until smooth.
Dip the Pops
Dip each chilled cake pop into the melted coating, making sure it is fully covered. Allow excess coating to drip off.
Decorate
While the coating is still wet, add sprinkles or edible decorations. Allow the pops to set upright in a styrofoam block or glass.
Enjoy your beautifully crafted cake pop flowers!
Pro Tips
- Always ensure the cake pops are chilled before dipping to prevent the coating from melting. Experiment with different shapes and designs for a unique look.
Flavor Variety
Experiment with different cake flavors beyond vanilla for your pops, such as chocolate or funfetti, to cater to various tastes. Incorporate fruit purees into your frosting for a burst of flavor—think raspberry frosting with lemon cake or a rich chocolate cake base paired with mint frosting. These choices can lend an additional surprise with every bite of your cake pop flowers.
Remember that the type of melting chocolate you use can also add different flavors. Instead of standard candy melts, consider using butterscotch or peanut butter chocolate melts for a unique twist. Each choice not only alters the flavor profile but also the visual appeal since colored chocolates can brighten your display.
Scaling the Recipe
If you're planning a larger event or just want to make more cake pops, scaling the recipe is straightforward. Simply double or triple the amount of cake mix and frosting, keeping the proportions the same. Bake the cake in larger pans if needed and adjust your baking time, as thicker cakes might require an additional 5-10 minutes in the oven until a toothpick inserted in the center comes out clean.
For large gatherings, consider making multiple flavor varieties at once. This creates an exciting dessert table for guests to enjoy and allows you to showcase your creativity. Just be sure to clearly label each type, especially if you're trying new and adventurous flavor blends that people might have allergies to.
Questions About Recipes
→ Can I use different cake flavors?
Absolutely! Feel free to experiment with chocolate, lemon, or any other flavor you love.
→ How can I store the cake pops?
Store them in an airtight container at room temperature for up to a week.
→ Can I freeze the cake pops?
Yes, you can freeze them! Just remember to wrap them in plastic wrap and seal them in a freezer bag.
→ What kind of decorations can I use?
You can use sprinkles, edible glitter, or even pipe icing flowers for additional decoration!
Creative Cake Pop Flower Ideas
Created by: The Chefkennethcooks Team
Recipe Type: Sweet Baking Treats
Skill Level: Easy
Final Quantity: 12 pops
What You'll Need
Cake Pops
- 1 box of vanilla cake mix
- 3 large eggs
- 1/2 cup vegetable oil
- 1 cup water
- 1/2 cup strawberry frosting
- Melting chocolate or candy melts
- Lollipop sticks
- Sprinkles or edible decorations
Decoration
- Colorful edible markers
- Green candy melts for leaves (optional)
- Flower-shaped cookie cutters (optional)
How-To Steps
Prepare the vanilla cake mix according to the package instructions. Bake in a preheated oven at 350°F (175°C) for about 30 minutes. Allow it to cool completely.
Once the cake is cool, crumble it into a large bowl. Add the strawberry frosting and mix until well combined. The mixture should be moldable.
Scoop about a tablespoon of the mixture and mold it into flower shapes or balls. Insert a lollipop stick into each pop and place them on a baking sheet lined with parchment paper.
Refrigerate the cake pops for at least 30 minutes to firm up.
In a microwave-safe bowl, melt the chocolate or candy melts according to the package instructions until smooth.
Dip each chilled cake pop into the melted coating, making sure it is fully covered. Allow excess coating to drip off.
While the coating is still wet, add sprinkles or edible decorations. Allow the pops to set upright in a styrofoam block or glass.
Extra Tips
- Always ensure the cake pops are chilled before dipping to prevent the coating from melting. Experiment with different shapes and designs for a unique look.
Nutritional Breakdown (Per Serving)
- Calories: 150 kcal
- Total Fat: 8g
- Saturated Fat: 4g
- Cholesterol: 35mg
- Sodium: 70mg
- Total Carbohydrates: 20g
- Dietary Fiber: 0g
- Sugars: 12g
- Protein: 2g